TLDR;
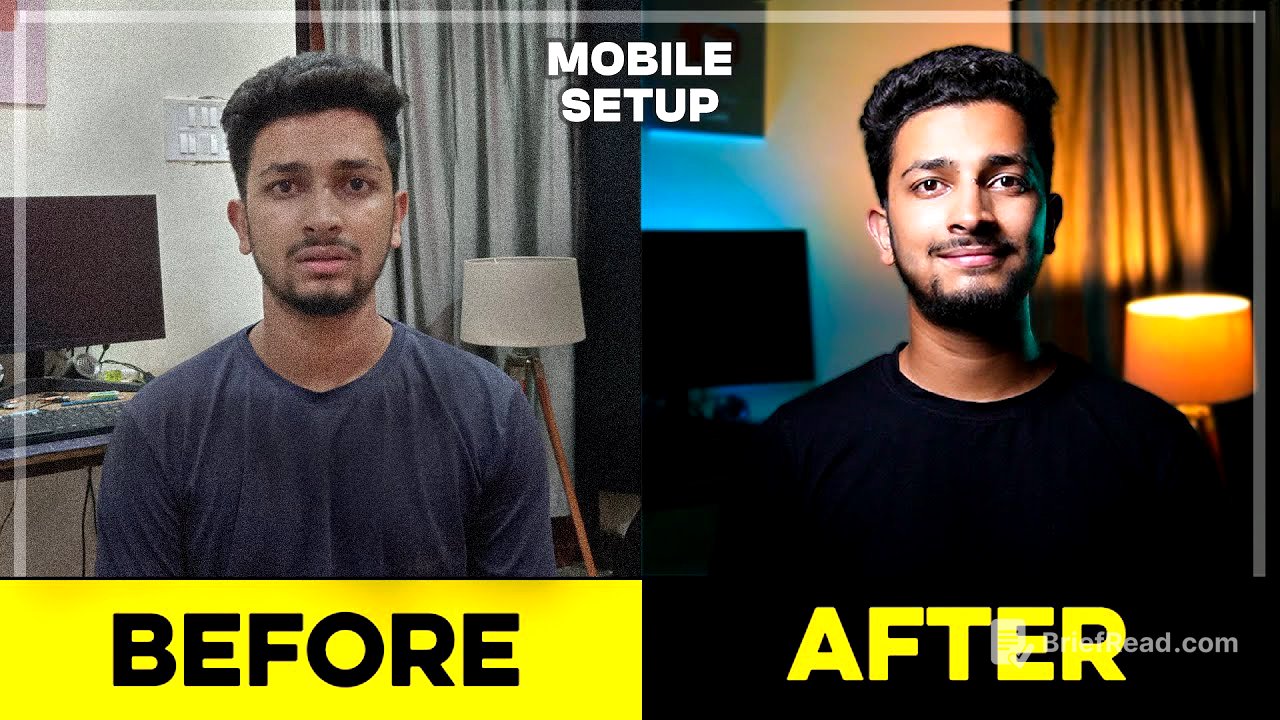
A cinematic-looking video can be made with a smartphone; expensive camera equipment is not the main requirement. The most important improvements come from controlling the recording environment, shaping the lighting, setting the phone camera carefully and making restrained edits.
- Improve the room acoustics before buying an expensive microphone.
- Use a key light, a rim light and practical lights to shape the shot.
- Keep the background tidy and use manual camera settings where possible.
- Treat smartphone footage cautiously: its exposure and colours may change unexpectedly, especially when the scene or lighting changes.
Intro [0:00]
The finished video initially looks and sounds poor, despite being recorded with a capable camera. The creator reveals that the demonstration is actually being filmed on a smartphone costing about ₹20,000, showing that an expensive camera is not essential for a cinematic result. The video focuses on improving the setup through sound, lighting, camera settings and post-production.
Step 1: Improve the Audio [0:25]
Good sound starts with the recording space, not with buying a microphone. Reduce background noise by lowering the fan speed, then check the room for echo by clapping and listening for the sound to reverberate. Instead of expensive acoustic foam, use affordable mattresses, cushions or thick blankets around the recording area to absorb reflections from nearby walls.
Once the room is under control, use a microphone if you have one. The creator uses a Zoom H1n, which costs about ₹8,000, but says beginners do not need to spend that much. Smartphone audio can be enhanced using an AI tool such as Adobe Podcast; this can sound acceptable through phone speakers, though it may sound worse through headphones.
Step 2: Control the Lighting [2:32]
For a controlled indoor look, block natural light from windows and doors so the lighting remains consistent. Recording at night is another option, provided outside noise is not a problem. The lighting setup is then built from a key light, rim light and practical lights, each serving a different purpose.
2.1 Key Light [2:52]
The key light is the main source illuminating the subject’s face, so it has the greatest effect on how the subject looks. The creator uses a Digitek DL2W light costing about ₹3,500, but a bulb can work on a tighter budget if its light is directed mainly at the subject rather than spilling across the background. A softbox with a grid or barn doors helps control spill and keep the background darker; a DIY box can do something similar, though it is harder to position and control.
A sufficiently powerful source is important: the creator’s light is 25 watts and recommends at least a 40–50-watt bulb if using one. The light should also be softened, with diffusion or a reflector where needed. Place it roughly 45 degrees to the subject and angle it slightly downwards to create a gradual balance of highlights and shadows rather than leaving one side of the face completely dark.
2.2 Rim Light [5:28]
A rim light picks out the edge of the subject and helps separate them from the background. The creator uses an inexpensive RGB brick light, which allows its colour to be changed. Position it behind the subject, around 210 degrees from the camera-facing direction, rather than directly at the side; this lights the outline without colouring an entire side of the subject’s face.
2.3 Practical Light [6:06]
Practical lights are visible sources of light within the frame, such as a lamp, bulb or glowing decorative object. The example uses an RGB brick light as a blue practical and a lamp costing about ₹1,100. Practical lights do not need to be expensive or specialised: almost any glowing object can work if it looks appropriate in the shot.
Camera Settings and Best App [7:08]
A good camera cannot make an untidy scene look good, so first remove clutter from the background. For smartphone recording, the creator advises using a manual camera app rather than the default camera app, because automatic adjustments can cause exposure or lighting changes even when exposure has been locked. Filmic Pro and Protake are given as suitable options.
The video explains that aperture (the lens opening, or “A0” as referred to in the transcript) affects the brightness of the scene: increasing it brightens both the subject and the background, while a lower setting helps keep the background darker. Set the shutter speed to roughly double the frame rate: for 25 frames per second, use 1/50; for 30 frames per second, use 1/60. Matching the shutter speed to the local power frequency helps reduce flicker from artificial lights.
White balance controls the colour temperature of the image. Blue tones suggest cooler light, while orange tones suggest warmer light; adjust the setting until skin looks natural rather than relying on one fixed number. The creator uses around 6,200 kelvin on the smartphone, despite 4,700 kelvin appearing neutral in the room. Record at the highest practical resolution, and avoid artificial phone features such as simulated background blur, which can look flat or unnatural.
Colour Grading and Background Blur [9:56]
Smartphone footage may change colour or brightness when the creator leaves the frame and returns, even if the lights and camera settings appear unchanged. The colour-grading demonstration therefore uses a take recorded continuously in one go. Smartphone footage is already software-processed and sharpened, so grading often involves reducing contrast and adding softness; however, this OnePlus 8 clip looks washed out, so the creator instead increases contrast slightly, settling at about 8, and raises vibrance to around 40.
A subtle negative vignette of about -3 helps direct attention towards the centre of the frame. To strengthen only the teal rim light, the creator uses the HSL Secondary panel to select that colour, refine the selection and apply a small adjustment. The colour correction remains restrained because the lighting already produces a well-lit image.
For background blur, an adjustment layer is placed over the footage and a Gaussian Blur effect is applied. An elliptical mask is drawn around the subject, given a feather value of about 20, then inverted so the blur affects the area outside the subject. The blur is adjusted to around 15, producing a softly blurred background while keeping the subject clear.
Final Output and Precautions [15:10]
When recording on a smartphone, complete the recording in one continuous session where possible. The creator found that after leaving the frame, the phone produced noticeably different colours on returning, despite the same camera settings and lighting. Unlike a dedicated camera, the smartphone did not reliably reproduce the original image, and adjustments could not fully restore it.
Adding lights can also change the smartphone’s image unexpectedly: the rim light and practical light interfered with the existing lighting and altered the recorded output. The creator could soften the changes in the edit but could not completely correct them. The video ends by inviting viewers to share their observations and follow the channel for further filmmaking, storytelling and editing breakdowns.