TLDR;
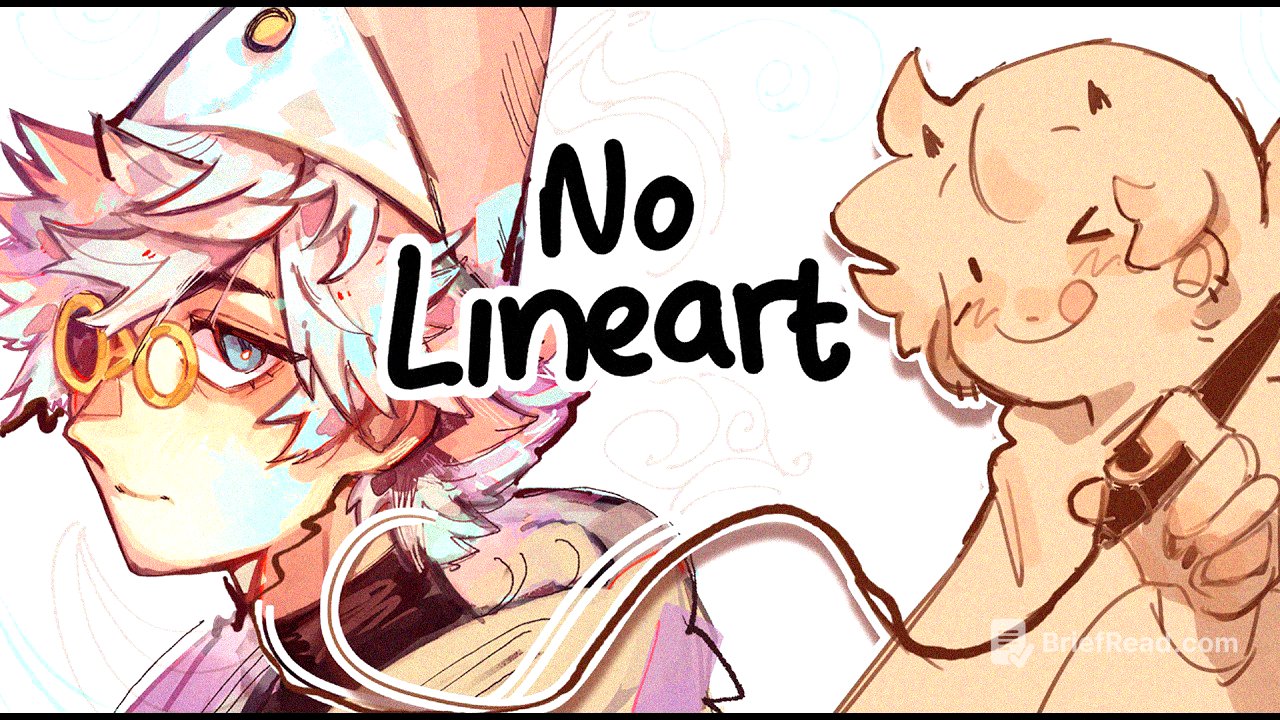
This video is a tutorial on how to create art without traditional line art. Bluebiscuits shares her method for cleaning up sketches and rendering on top of them to achieve a polished look. The key points include:
- Cleaning up the initial sketch through iterative refinement using brushes and erasers.
- Using base colors and adjusting line art settings to create depth and dimension.
- Rendering over the sketch to achieve a desired art style, whether clean or messy.
Intro [0:00]
Blue introduces the video's topic: skipping line art in the artistic process. She explains that she personally dislikes doing line art because she feels the initial sketch often looks better and more lively. She aims to demonstrate how to achieve a finished art piece without relying on traditional line art, a technique she has used for a long time.
Why Sketches Look Better [0:40]
The initial sketch often looks better because there's less pressure to make it perfect. This allows for more natural flow, shape, and longer strokes. In contrast, line art can become difficult if the underlying sketch isn't well-defined, leading to a flat appearance. To make line art effective, you need both good flow and a solid base to work from. However, if you dislike line art, you can skip it by cleaning up the sketch and rendering directly on top.
Skillshare Sponsor [1:35]
The video is sponsored by Skillshare, an online learning platform. Blue shares her experience taking a class called "Kickstart Your Creativity with Procreate" by Lisa Bardot, which helped her creatively explore and create fun drawings without pressure. Skillshare offers thousands of classes in various fields, and the first 500 people to use the provided link will get a one-month free trial.
Cleaning Up the Sketch [3:20]
To skip line art, the first step is to clean up the sketch. It's important to have easy access to both your brush and eraser, using shortcuts or gestures. The brush should have some transparency, like an airbrush or a light, fluffy brush, to avoid overly solid shapes. Start with a thick brush for the initial sketch and gradually decrease the brush size as you refine the lines. Copy and paste the initial sketch onto a new layer, reducing the opacity of the original to use as a guide. This allows you to revert to earlier versions if needed. Clean up the sketch on the full opacity layer, avoiding zooming in too much to maintain focus on the overall shapes.
Sculpting the Form [5:47]
Continue cleaning up the sketch by repeatedly copying and pasting the sketch, reducing the opacity of the layer below, and refining the lines with smaller brushes. This process is described as "carving" or "sculpting" the form using the eraser. As the brush size decreases, switch to a more solid brush for finer details. Since the artwork will be painted over, the sketch doesn't need to be perfect. You can also use tools like the lasso tool or thicker brushes to further define shapes. This method maintains the flow of the sketch while providing a well-defined base for rendering. This technique can also be applied to traditional art by lightly erasing the sketch and using different mediums to clean it up.
Adding Base Color [7:01]
For adding base colors, Blue uses a lasso tool that auto-fills with lines, which she admits is messy but complements her style. The blurry lines created by this method are useful for rendering later on. You can tweak this method to fit your desired style. Set the line art layer to "multiply" and color it a dark purple to add depth and color variations. Then, color the line art with an airbrush, choosing a darker color than the base color. Because the line art layer is set to multiply, it will always appear darker than the layers beneath it.
Rendering and Final Touches [8:21]
Create a new layer above everything else to begin painting. Use the outer and inner colors to refine the lines, making them thinner and neater to resemble line art. If the lines aren't dark enough, sample the darkest color from the existing line art and add it to the lines to maintain color harmony. Repeat this process across the entire piece, cleaning up each line. This method is versatile and can be adapted to various art styles, from lineless to clean, solid line art. The amount of time spent on this step determines the cleanliness of the final piece. Blue adds scribbly lines and textures for a more personal touch.
Conclusion [10:30]
The key is to find a process that makes art enjoyable for you. Whether you like or dislike line art, it doesn't diminish your value as an artist. Experiment with different techniques to find what works best for you. Blue shares that she created this video because she remembers searching for ways to skip line art when she was starting out. She thanks her Patreons, fan artists, and Skillshare for their support. She also mentions her new Patreon series with tutorials and homework reviews, with the first topic being face plans.