TLDR;
A professional-looking YouTube video can be made with a modest phone and an affordable lighting setup. The key steps are to improve audio, arrange the frame, control and position lights, set the camera manually, and refine the footage in editing.
- Good audio matters more than expensive camera equipment.
- Balanced framing and controlled lighting create a clear, polished image.
- Manual camera settings and selective editing help achieve a consistent cinematic look.
- Start with the equipment available and improve the setup gradually.
Steps Required [0:00]
A cinematic YouTube setup can be created without an expensive camera: the video itself is recorded on a four-year-old phone costing ₹15,000. Understanding the basic principles matters more than the price of the equipment, and they can be applied to a setup costing anything from ₹1,000 to ₹10,000. The process has five steps: audio, framing, lighting, camera settings and editing.
Step 1: Improve the Audio [0:34]
Clear audio is essential: viewers are more likely to watch a video with professional sound and a basic setup than one with poor sound and impressive lighting. Choose a microphone that suits your budget, or record on a phone and improve its audio with suitable techniques. The creator is recording on a phone to show that good results do not depend on expensive gear.
Step 2: Set the Frame [0:56]
Choose a background that reflects your personality or profession, then add a few suitable elements, such as a plant or bookshelf. Keep the visual weight balanced across the left and right sides so one side does not feel crowded. Sit or stand some distance from the wall to create depth, position your head between the framing guides, and leave enough headroom. Screen-casting the camera view to a laptop can make it easier to set the composition without repeatedly recording and checking the footage.
Step 3: Control and Position the Lighting [1:42]
Consistent lighting requires control over the scene. For predictable results, block outside light with curtains; daylight can also work, but changing sunlight and clouds may alter exposure. Uncontrolled LED lights spread across the room, so manage where light falls. The key light is the strongest source and should be soft: the creator uses a softbox with a 30 W LED bulb, while a DIY softbox can be made cheaply. A grid on the softbox directs the light onto the subject and limits spill onto a dark background. Place the key light roughly 45 degrees to one side of the camera and slightly above the subject, angled downwards.
A weaker fill light on the opposite side softens the shadows created by the key light; the creator uses a 5 W bulb in a DIY softbox. A rim light placed behind the subject, ideally about 180 degrees from the key light, highlights the subject’s edges and separates them from the background. Practical lights in the background establish the room’s style: bright LED strips can suit gaming videos, warm tones can suit professional settings, and steel-blue with orange can create a cinematic look. DIY options include a warm bulb in a homemade moon lamp and a blue-covered bulb shining through a hole in polystyrene to imitate moonlight. Bright clothing also helps the subject stand out against a dark background.
Step 4: Set the Camera Manually [5:35]
Use manual camera mode to control the image rather than relying on automatic settings. Some phones have a dedicated movie mode; if it records a wider image, crop it during editing. Turn off stabilisation and artificial blur for a seated shot, since blur can be added later. The main settings to understand are ISO, shutter speed, white balance and focus.
Keep ISO as low as possible because raising it digitally brightens the image but can introduce noise. The creator uses ISO 100 and recommends increasing it only if the image is too dark, with 400 as a possible upper limit. Set the shutter speed to approximately double the frame rate for natural motion blur, while matching the camera to India’s 50 Hz electrical lighting to prevent flicker; the creator therefore uses 1/50 rather than 1/60. Set white balance to match the main light’s colour temperature so skin tones look natural. For the creator’s 6,500 K LED bulb, the camera is set to the same temperature. Finally, lock focus on the subject, using a screen-cast view if needed to select the face accurately.
Step 5: Enhance the Image in Editing [8:09]
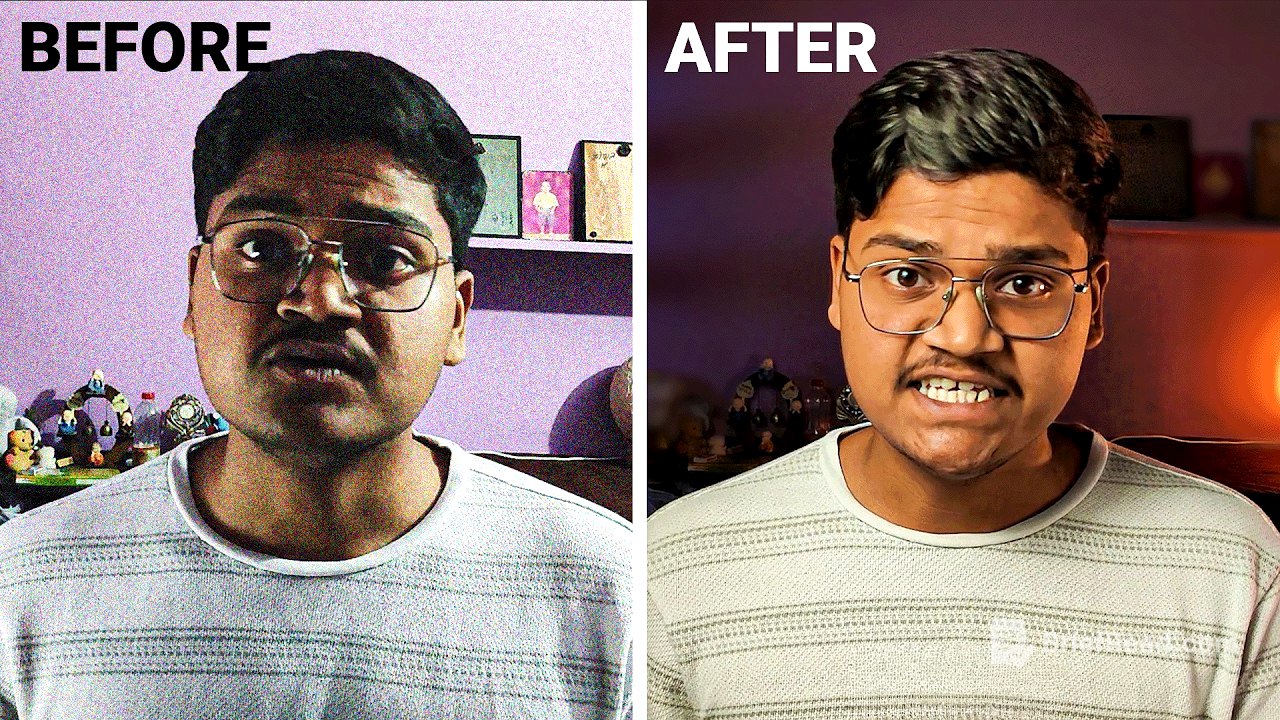
In Premiere Pro, fit the wider movie-mode footage to the frame and use grid lines to centre the subject. Make small colour adjustments, including reducing contrast slightly for a softer look and increasing vibrance to bring out the colours. To brighten the face without changing the whole image, use Lumetri Colour’s HSL Secondary tool to select the skin tone, refine the selection with the saturation and luminance ranges, and mask out the background. Apply a little denoising and blur to smooth the selection, then raise the face’s exposure slightly and add a subtle red tint for a more natural skin tone.
Use a feathered mask around the subject to keep the colour adjustments confined to the face and add a subtle vignette around the subject to direct attention towards them. For background blur, apply Gaussian Blur, create and feather a mask around the subject, then invert it so the area outside the mask is blurred. Adjust the blur to look realistic; the creator uses 24. Leave room around the head if it moves, and keep the background lights outside the blur mask so they do not appear awkwardly half-blurred. These adjustments draw attention to the subject and give the footage a more cinematic finish.
Motivation: Start with What You Have [8:37]
The complete process may seem demanding, and you may not have all the equipment, but you can still start filming. Use window light during the day or improvise with available lights at night, then apply one improvement at a time. Prioritise audio first, because lighting helps viewers see the video while sound carries the message to them.