TLDR;
This session focuses on resolving MongoDB registration issues and introduces fundamental HTML tags and CSS styling. It covers the correct method for MongoDB registration, various HTML tags like image, lists, anchor, and input, and CSS concepts including inline, internal, and external styling with different selectors.
- MongoDB registration troubleshooting
- Introduction to HTML tags: image, lists, anchor, input
- CSS styling: inline, internal, external, and selectors
- Practical examples and explanations of each concept
MongoDB Registration Troubleshooting [41:07]
The session addresses issues students face while registering for MongoDB. It emphasizes that new users should avoid the "Google authenticate" button and instead click the "sign up" option. Users are instructed to enter their email ID (preferably the one registered with NM), first name, last name, and create a password, leaving the company field blank. This manual registration process is crucial because directly clicking on Google can cause login errors due to mismatched registration methods.
HTML Image Tag [58:57]
The lecture introduces the image tag in HTML, highlighting its two mandatory attributes: src (source) and alt (alternative). The src attribute specifies the URL of the image to be displayed, while the alt attribute provides alternative text if the image source is invalid or the image cannot be loaded. If the image source is broken, the text specified in the alt attribute will be displayed, ensuring accessibility and providing a fallback for missing images.
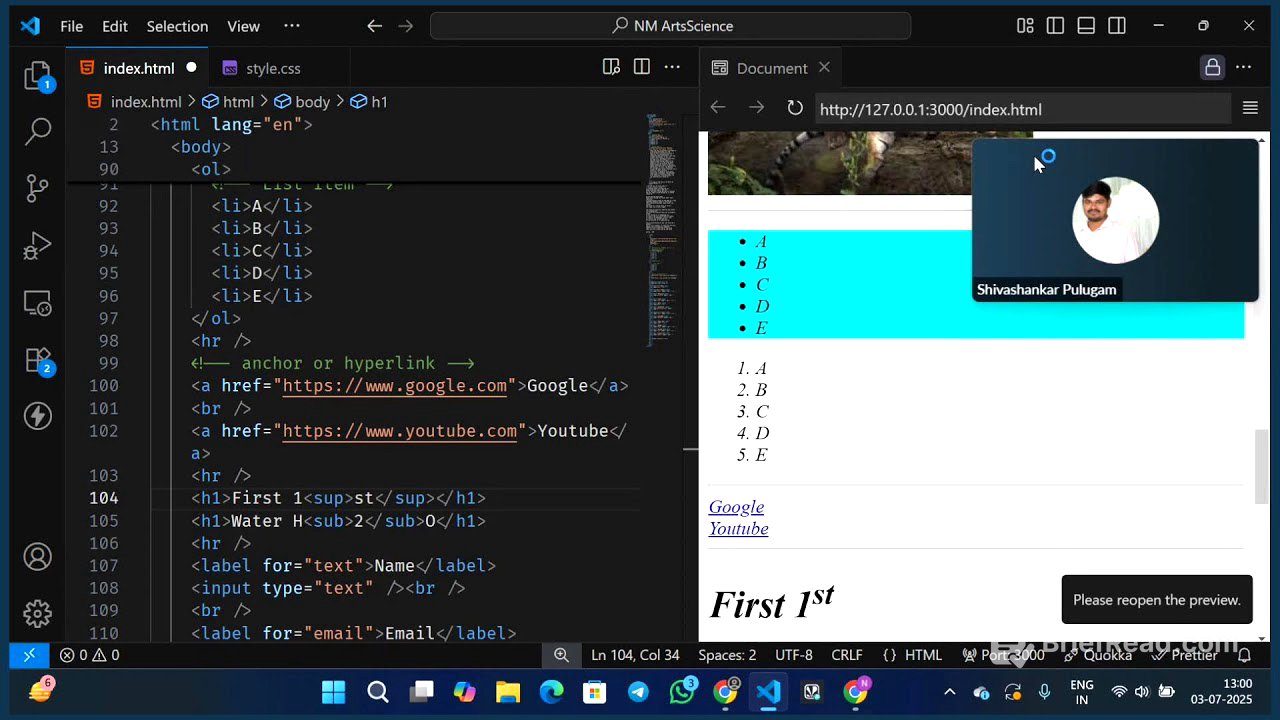
HTML Lists: Ordered and Unordered [1:04:35]
The session explains the two types of lists in HTML: ordered lists (ol) and unordered lists (ul). Ordered lists display items with a numbered sequence, indicating the order or priority of the items. Unordered lists, on the other hand, use bullet points to list items without any specific order. List items (li) are used within both ordered and unordered lists to define individual elements in the list.
HTML Anchor Tag (Hyperlink) [1:07:44]
The anchor tag (<a>), also known as a hyperlink, is used to create links to other web pages or resources. The href attribute specifies the destination URL. To ensure proper navigation, especially with external links, it's important to include the https:// protocol. The <br> tag is introduced as a way to create line breaks, which can be used to format the layout of elements on a webpage.
HTML Formatting: Superscript, Subscript, Bold, and Italic [1:14:36]
The lecture covers formatting tags in HTML, including superscript (<sup>), subscript (<sub>), bold (<b>), and italic (<i>). Superscript is used to display text slightly above the normal line, often for exponents, while subscript displays text slightly below the normal line, commonly used in chemical formulas like H₂O. The <b> tag makes text bold, and the <i> tag italicizes text, enhancing the visual presentation of content.
HTML Horizontal Rule and Input Tags [1:20:02]
The horizontal rule tag (<hr>) is used to create a horizontal line, visually separating content sections on a webpage. Input tags (<input>) are used to create interactive form elements for user input. Various input types are discussed, including text, email, password, time, date, color, checkbox, radio button, range, file upload, search, and number. Each input type serves a specific purpose, such as collecting names, email addresses, passwords, or allowing users to select dates, times, or upload files.
Introduction to CSS: Inline, Internal, and External [1:36:58]
The session introduces CSS (Cascading Style Sheets) and its role in styling HTML elements to enhance the visual appearance of web pages. CSS can be written in three ways: inline, internal, and external. Inline CSS involves adding styles directly within HTML tags using the style attribute. Internal CSS is defined within the <style> tag inside the <head> section of an HTML document. External CSS involves creating a separate .css file and linking it to the HTML document using the <link> tag.
CSS Selectors: Element, Class, ID, and Universal [1:44:17]
The lecture explains CSS selectors, which are used to target specific HTML elements for styling. The four main types of selectors are element selectors, class selectors, ID selectors, and universal selectors. Element selectors target HTML elements directly by their tag name (e.g., p for paragraph). Class selectors target elements with a specific class attribute (e.g., .heading for elements with class="heading"). ID selectors target a unique element with a specific ID attribute (e.g., #main for an element with id="main"). Universal selectors (using *) target all elements on the page.
Practical Examples of CSS Selectors [1:51:30]
Practical examples are provided to demonstrate how CSS selectors work. Element selectors apply styles to all instances of a specific HTML element. Class selectors allow styles to be applied to multiple elements sharing the same class, providing a way to group and style related elements. ID selectors are used to style a single, unique element on a page, ensuring that the style is applied only to that specific element. The universal selector applies styles to all elements, providing a way to set global styles for the entire page.
External CSS and Linking [2:00:33]
The session emphasizes the importance of using external CSS for better organization and maintainability. External CSS involves creating a separate .css file and linking it to the HTML document using the <link> tag in the <head> section. The href attribute of the <link> tag specifies the path to the CSS file, and the rel attribute is set to "stylesheet" to indicate that the linked file is a CSS stylesheet. This approach keeps the HTML clean and allows for easy reuse of styles across multiple pages.
HTML Div Tag and Pixel Unit [2:13:08]
The lecture introduces the <div> tag, which is used to create divisions or containers for grouping HTML elements. Divs help organize and structure content on a webpage, making it easier to apply styles and manage layout. The concept of pixels (px) as a unit of measurement for screen size is explained, with a pixel being a single dot on the screen. Understanding pixels is crucial for specifying sizes and dimensions in CSS.