
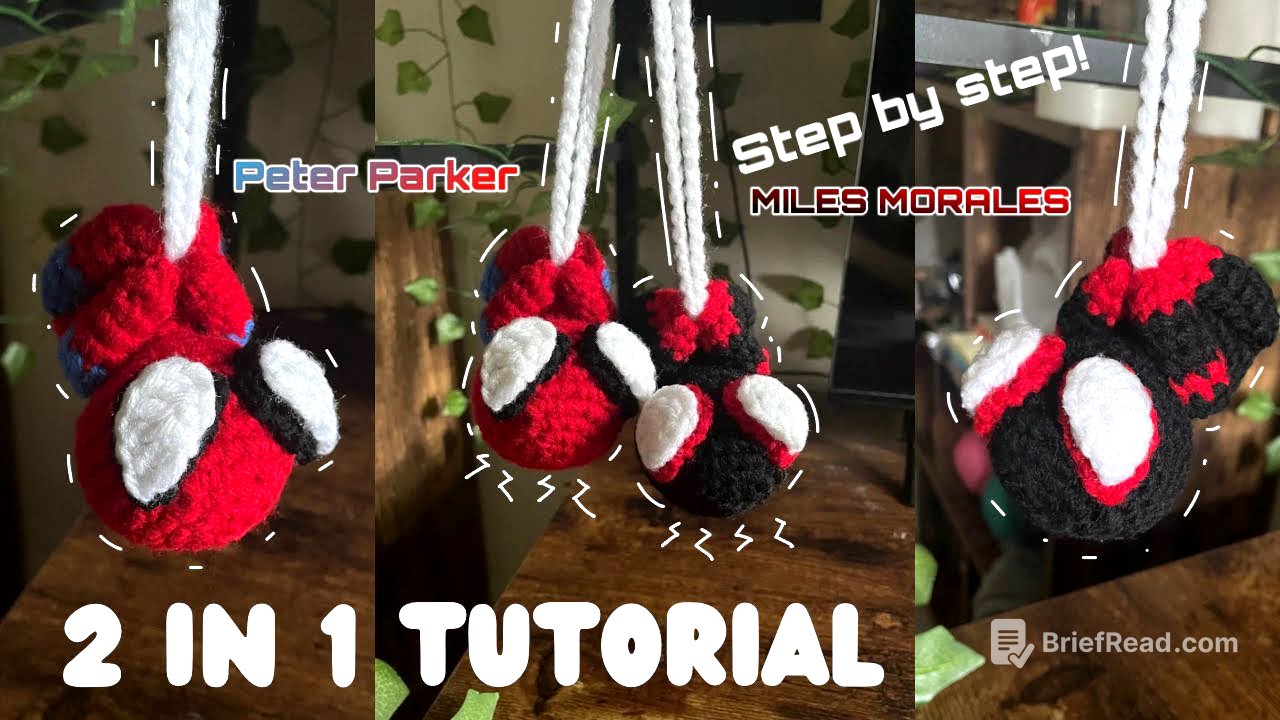
TLDR;
This video tutorial demonstrates how to make Spider-Man crochet hangers using various yarn colors. The project covers the entire creation process, from initial preparations to final assembly.
- Required materials include different colored yarns, stuffing, and tools like scissors and a crochet hook.
- Step-by-step instructions are provided for each component: head, body, arms, legs, eyes, and web attachment, culminating in a completed Spider-Man figure.
Intro [0:00]
The tutorial begins with a welcome message and an overview of what will be created—Spider-Man hangers for decoration. The instructor emphasizes their utility, suggesting placement options like cars and desks.
Materials [0:12]
The necessary materials are listed, including stuffing, red, black, white, and blue yarn, a 3.5 mm crochet hook, scissors, a stitch marker, a sewing needle, and pins.
Head [0:31]
The head is created using a magic ring and six single crochets to start. The tutorial explains how to increase the stitches gradually through rounds 2 to 4, aiming for a total of 24 stitches. Rounds 5 through 9 consist of single crochet without any increases.
Body [11:26]
To start the body, the user works into the front loops of the previous rounds. Round 13 introduces increases to achieve a total of 18 stitches. In round 14, both loops are used for single crochet and increases, totaling 24 stitches by the end. Rounds 15 through 17 consist of standard single crochets.
Arms [21:21]
The arms begin with a magic ring containing six single crochets, with four rounds created in total. A color change to blue occurs at the end of round 5, followed by single crochets for rounds 6 and 7.
Legs [23:09]
The legs start with a magic ring and eight single crochets. The second round reduces stitches to six through a series of single crochets and decreases. After two rounds of single crochets, a color change to blue occurs at the end of round 4, followed by three additional rounds of blue.
Inner Eye [26:53]
The inner eye is created starting with a magic ring containing three single crochets. After tightening the ring, two double crochets are added to each stitch. Once this is complete, the piece is fastened off.
Outer Eye [28:50]
The outer eye begins similarly with a magic ring, but contains four single crochets. Following a similar process as the inner eye, it also includes chaining and double crochet increases.
Joining the Eyes [31:16]
The tutorial explains how to attach the inner and outer eye components together using sewing techniques. The joining method ensures the eyes are securely assembled and fit the overall design.
Attaching Arms and Legs to Body [34:09]
Arms are aligned and attached to the body, specifically at the color change locations for a cleaner look. The same process is applied to attach the legs, ensuring proper alignment.
Making the Web [35:11]
The web is made by chaining about 50 to 60 stitches, which can be adjusted based on personal preference for length.
Attaching the Web [37:32]
The web is attached to the body in between specified rounds, with steps provided for securing it in place. Both sewing and gluing techniques are mentioned, allowing for customization.
Joining Limbs Together [39:20]
All limbs are pinned in place before being sewn together around the web. The process to securely connect the limbs is elaborated step by step to ensure stability.
Outro [42:54]
The video concludes with a summary of the project and a request for viewers to like and subscribe for future content. A glimpse of the completed Spider-Man hanger is shown, encouraging viewer participation and feedback.