TLDR;
This video provides a comprehensive guide on how to bleed the fuel system of an 1800 BMC marine engine. It covers identifying bleed points, manually pumping fuel, and using the engine to ensure all air bubbles are removed. The process involves working through various bleed nuts on the fuel filter unit, fuel regulator, and fuel injectors.
- Identify all bleed points on the fuel system.
- Manually pump fuel using the lever on the fuel pump.
- Use the engine to assist in bleeding the fuel injectors.
- Ensure fuel is flowing cleanly from each bleed point before moving on.
Introduction to Bleeding the Fuel System [0:06]
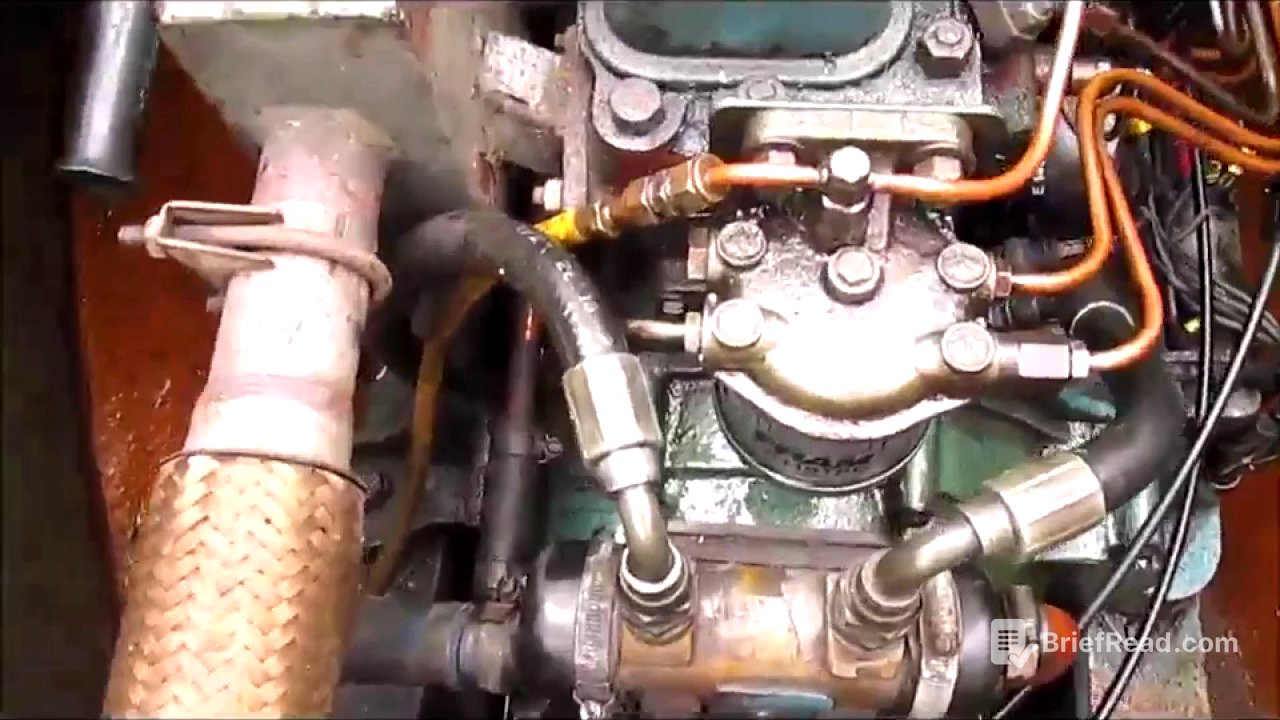
The video introduces an 1800 BMC marine engine and explains the process of bleeding its fuel system. The entire process can take a couple of hours to complete properly, ensuring all air bubbles are removed for optimal engine performance. The initial focus is on the fuel filter unit, which contains the first three bleed points: the fuel entry point, the fuel exit to the fuel regulator, and the pressurised re-entry point.
Identifying Key Components [0:35]
The video identifies key components such as the fuel filter unit, which houses the initial bleed points, and the fuel regulator unit, which has three bleed nuts on top, on the side, and leading to the first fuel injector. On the other side of the engine, the fuel pump is located, featuring a small lever used to manually push fuel around the engine. The engine also has four injectors, which serve as the final bleed points.
Initial Steps and Fuel Pump [2:55]
Before starting, ensure there is fuel in the tank to provide pressure and avoid pumping gunk. Locate the fuel pump on the left-hand side of the engine and practice pumping it manually with your finger. Then, remove the first bleed point directly from the fuel pump using a 13mm spanner. Fuel should come out in spurts when pumping; if not, there may be a significant blockage in the fuel tubes.
Bleeding the Fuel Regulator [4:27]
The next step involves bleeding the points around the fuel regulator. After the initial bleed point, move to the second one leading to the fuel regulator. With a new filter, fuel should come out in spurts when pumped manually. Then, focus on the fuel regulator itself, using an 8mm socket to loosen the bleed nut on top of the casing. Pump for about five minutes until fuel comes out. It's important only to loosen the bleed nuts, not remove them entirely.
Final Bleed Points and Fuel Injectors [5:49]
Once fuel is dribbling out of the housing bleed nut, move to the bleed nut on the side of the regulator. The presenter recommends using the engine to assist with this step, as well as for the re-entry to the fuel filter. The fuel injectors also require the engine's assistance, as manual pumping is likely insufficient. The goal is to see the injectors dribbling a good amount of diesel.
Completing the Process [7:15]
Allow the diesel to flow from the injectors, ensuring it drips down into the sump. Once a good flow is established, unplug and repeat the process on the other two injectors. After completing these steps, the engine should be almost ready to start. Tighten everything up, and the engine should be good to go.