TLDR;
This video provides a comprehensive introduction to Planify Pro, a platform for creating and customizing planners. It covers essential features such as navigating the interface, using pre-made templates, creating planners from scratch, and utilizing various customization options like widgets, fonts, colors, and patterns. The video also explains how to export planners in different sizes, save them to your collection, and create listing images for commercial use.
- Opening website in Firefox private mode
- Using pre-made templates and creating new planners
- Customizing planners with widgets, fonts, colors and patterns
- Exporting and saving planners
Introduction to Planify Pro [0:00]
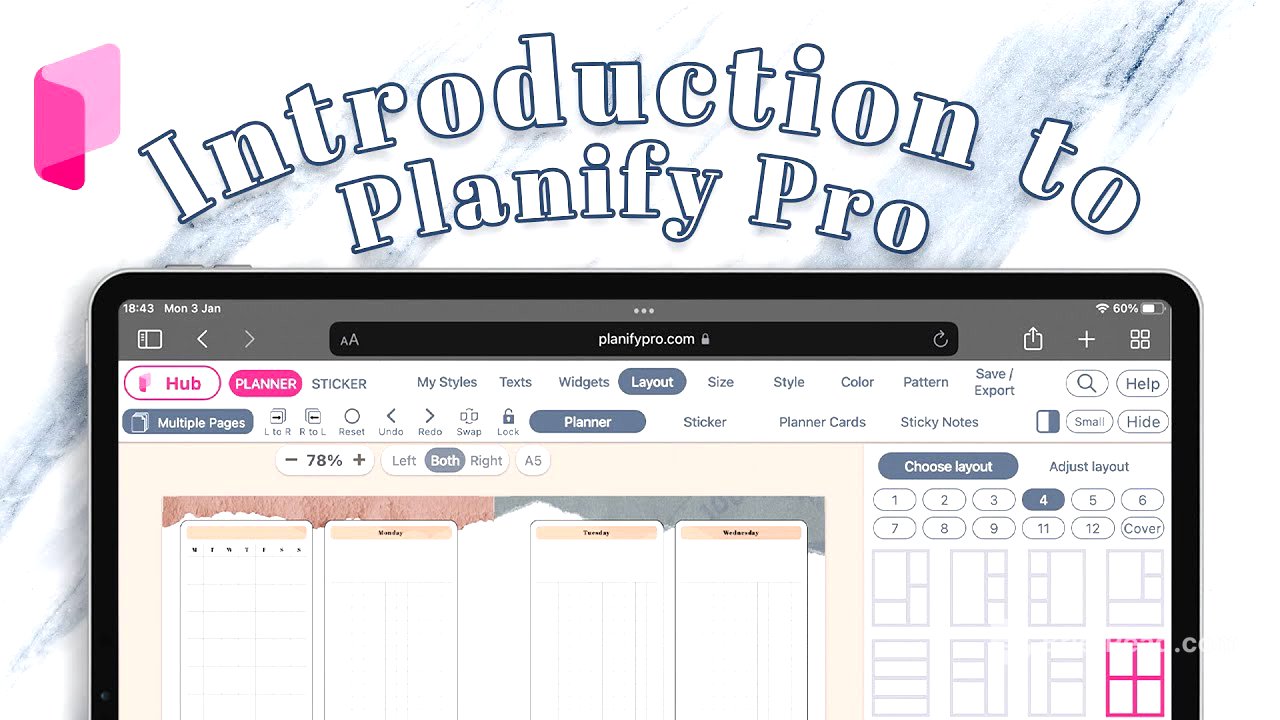
The video starts with a welcome message to Planify Pro and an overview of the platform's capabilities. It recommends opening the website in Firefox in a private mode window to ensure the newest version and updates are running. Once logged in, users can access public planners that can be used commercially with a business plan subscription.
Accessing and Using Pre-made Planners [0:38]
To open a planner, simply click on it. Multiple pages can be created by clicking on the multiple page option and adding pages. Planners are typically in A5 size, but they can be resized to A6, personal size, or other sizes, including those for Amazon KDP and traveler's notebooks. To download, click "Save Export," choose the paper size (e.g., US Letter), and generate a PDF. The download button will appear, allowing you to save the PDF to your computer.
Creating a New Planner from Scratch [2:38]
To create a new planner, click on "Create a New Planner." First, select a size such as A5, US Letter, or A4. Then, choose a layout, which is essential for structuring the planner. Planify Pro offers various layouts with different numbers of boxes. Select a layout and apply it to the template.
Inserting and Customizing Widgets [3:54]
To insert a widget, click on the desired box, go to "Widget," and select a widget to apply. Available widgets include calendars, grids, lists, time schedules, checkboxes, note boxes, and text fields. For example, to add a daily schedule, filter for "daily" and select the time schedule widget. Customize the widget by changing the text, showing or removing the header, and adjusting the time. The sticker side, which is 1.5 inches wide, can be removed if desired.
Adding Text and Headers [6:54]
To add a header, go to "Text" and select the right page. Click "Add Header" to add or remove the header. You can choose from different header types, such as a long box or a line. To customize the font, go to the "Font" tab and select a new font. The platform uses four types of fonts: H1 for the main header, H2 for widget headers, and H3 for text typed within the widgets. Adjust the font size as needed.
Styling and Coloring the Planner [9:33]
The "Styling" panel allows you to select the overall style of the planner, such as neutral, minimal, decorative, or bold. The "Color" panel lets you change the colors. You can generate random colors or select custom colors from the color palette. The color palettes are designed to match harmoniously. The planner uses three main colors: outline color for the lines around the widget, header color, and line color for the lines within the widgets. You can also individually change the color of each widget by clicking on it and adjusting the header and line colors in the settings.
Applying Patterns and Copy-Pasting Pages [12:44]
In the "Patterns" section, you can apply patterns to the planner, either fully or as a frame, border, or outline. Filter for specific patterns, such as flowers, and apply them to the template. To download the planner, it's recommended to copy and paste it to the left side by clicking the "right to left" button.
Creating Single Pages and Exporting [14:09]
Currently, Planify Pro requires creating both a left and right side, but the option to create single pages will be added in the future. To work around this, adjust the outer and inner padding to be the same. Remove any patterns that might take up space. When downloading, select the first option to generate a PDF with single pages and equal spacing on both sides.
Saving to Collection and Creating Listing Images [16:08]
To save the planner, click "Save" and save it to your collection. The collection is accessible by clicking on "Hub" and then "Collection." From here, you can download the file again. If you have a business plan, you can create listing images for platforms like Etsy by clicking "Make Listing Image." Customize the image by choosing a paper type, font, and text. Generate the listing image, which currently supports up to two pages.
Conclusion and Support [17:56]
The video concludes by summarizing how to create planners on Planify Pro and offering support through Instagram, Facebook, or the Facebook group.