TLDR;
This video provides a detailed guide on how to accurately draw complex shapes by training your eye to recognise angles and masses before using a ruler for verification. It emphasises starting with light sketches, using the side of the pencil to capture initial shapes, and constantly comparing different parts of the drawing to ensure proportionality. The tutorial also covers techniques for using negative space and imaginary lines to aid in accurate representation.
- Start with light sketches and focus on identifying angles and shapes.
- Use the side of the pencil to capture initial forms and adjust as needed.
- Constantly compare different parts of the drawing to maintain proportionality.
- Use negative space and imaginary lines to aid in accurate representation.
- Only use a ruler to check measurements after initial drawing by eye.
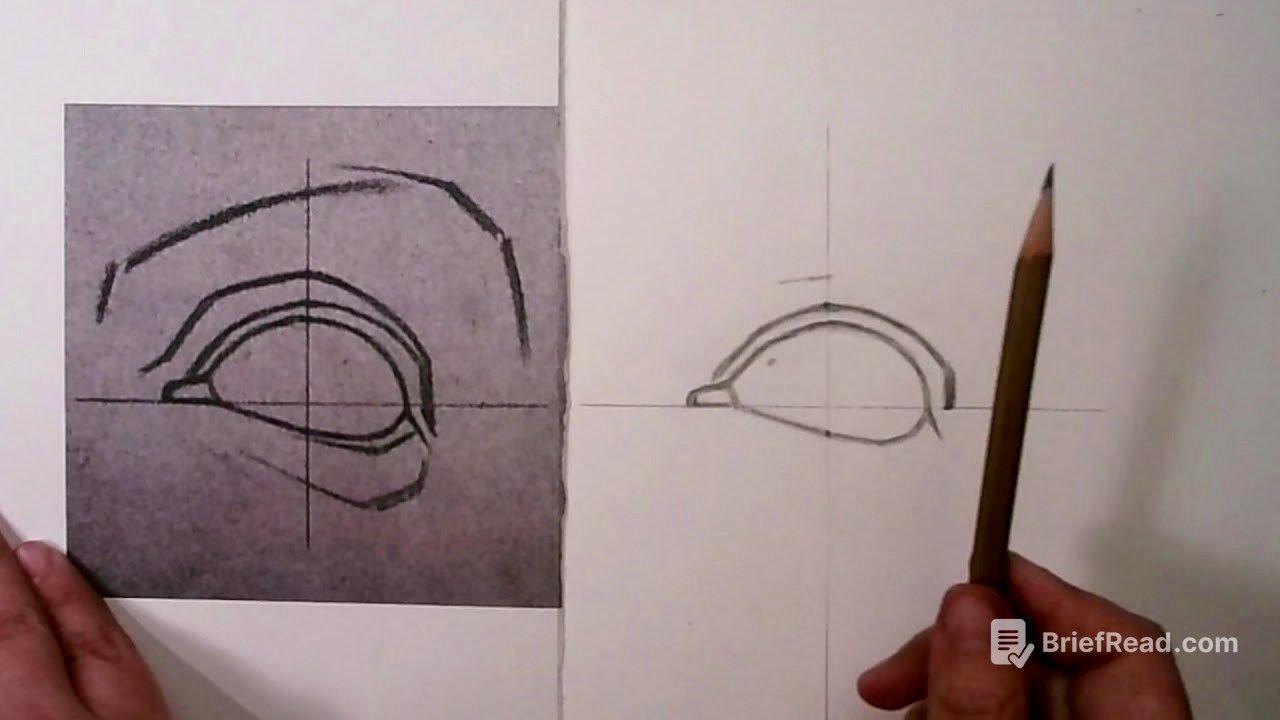
Preparing to Draw [0:05]
To begin, ensure you have a sharpened pencil. Fold your paper to create a straight edge, which will act as a makeshift ruler. Use this straight edge to draw your x and y axes, leaving enough room to accommodate the drawing. Starting from the centre, lightly sketch a triangle shape, using the side of your pencil. As confidence in the placement grows, apply more pressure to darken the lines.
Breaking Down Complex Shapes [1:10]
Complex forms can be simplified by breaking them down into a series of angles. For example, a shape can be seen as a sequence of one, two, or three angles. Use the side of your pencil to lightly sketch these angles, aiming for a site-sized drawing where the representation matches the actual size of the object. The goal is to train your eye to become more sensitive to angles before using a ruler.
Drawing by Eye and Checking Measurements [3:23]
Avoid using a ruler at the start. Instead, focus on drawing by eye, paying attention to the overall mass and comparing different shapes within the drawing. Once you have a basic sketch, use the ruler to check your measurements. This helps to refine your drawing and correct any inaccuracies.
Refining the Drawing [5:13]
Pay attention to the thickness of lines, as it affects the negative space within the drawing. Thinner lines create wider negative spaces, which can alter the overall appearance. Make adjustments by carving into lines with an eraser to achieve the desired thickness and shape. Ensure the initial part of the drawing is accurate, as any errors will affect subsequent measurements.
Adding Additional Lines and Checking Again [8:10]
Use the initial lines as a guide for adding more details. Squint your eyes to focus on the negative space and refine the lines accordingly. After adding a new line, recheck your measurements to ensure accuracy. Adjust angles and widths as needed to match the reference.
Continuing to Refine and Train Your Eye [11:28]
Continue refining the drawing by focusing on subtle angles and repeating shapes. Train your eye to see these details and draw them accurately. Use a kneaded eraser to carve into lines and make precise adjustments. The aim is to develop a sensitivity to angles and shapes through practice.
Mass Thinking and Final Checks [15:52]
Incorporate mass thinking by recognising shapes and forms within the drawing, such as seeing a hand or arm. Constantly switch between linear, angular, and mass thinking to create a more accurate representation. Use imaginary lines to check alignment and proportions. Make final checks on height and width to ensure the drawing is as accurate as possible.